


Blooket has taken the world of educational gaming by storm, offering a fresh and exciting way to engage students. If you’re an educator looking to bring some friendly competition and fun into your classroom, learning how to host a Blooket game is your first step. This guide will walk you through everything you need to know, from setting up your account to launching your very first game.
Hosting a Blooket game allows you to control the pace, review questions, and create a dynamic learning environment that students love. It transforms standard review sessions into thrilling contests where knowledge is the key to victory. By the end of this guide, you’ll be able to confidently set up and manage a Blooket game, making your lessons more memorable and effective.
Table of Contents
What is Blooket?
Blooket is an online learning platform that blends trivia and review games with gamified elements. Teachers can create their own question sets or use one of the millions of sets created by other users. Students join these games using a unique code and compete against each other in various game modes, from fast-paced races to strategic tower defense challenges.
What makes Blooket unique is its variety. Instead of just one quiz format, you can host the same set of questions in over a dozen different game modes. This versatility keeps the experience fresh and allows you to choose a game that best fits your lesson objectives and your students’ energy levels.
Getting Started: Setting Up Your Host Account
Before you can host a game, you need a Blooket account. The process is simple and free for educators.
- Visit the Blooket Website: Navigate to www.blooket.com.
- Sign Up: Click the “Sign Up” button, usually located in the top-right corner.
- Choose Your Sign-Up Method: You can sign up using your Google account or a standard email and password. Using a Google account is often quicker, especially if you already use Google Classroom.
- Confirm You’re a Teacher: Blooket will ask for your role. Select “Teacher” to gain access to all the hosting features.
- Complete Your Profile: Follow the prompts to finish setting up your account.
Once your account is created, you’ll land on your Blooket dashboard. This is your central hub for finding question sets, creating your own, and launching games.
Finding or Creating a Question Set
The core of any Blooket game is its question set. You have two options: use a pre-made set or create your own.
Using a Pre-made Question Set
Blooket has a massive library of question sets created by other teachers, covering virtually every subject and grade level.
- Use the Search Bar: From your dashboard, use the search bar at the top to look for a topic (e.g., “Photosynthesis,” “World War II,” “Multiplying Fractions”).
- Filter the Results: You can browse the results to find a set that matches your needs. Click on a set to preview the questions.
- Check the Questions: Review the questions and answers to ensure they are accurate and appropriate for your students.
- Favorite or Host: If you like the set, you can click the star icon to “Favorite” it for later or click “Host” to start a game immediately.
Creating Your Own Question Set
Creating a custom question set allows you to tailor the content precisely to your lesson plan.
- Navigate to “Create”: On your dashboard, click the “Create” button.
- Add Title and Description: Give your question set a clear title and a brief description. You can also add a cover image to make it stand out.
- Choose Creation Method: You can add questions manually, import them from a spreadsheet, or use Blooket’s “Quizlet Import” feature if you have existing sets on Quizlet.
- Add Questions Manually:
- Click “Add Question.”
- Type your question and up to four multiple-choice answers.
- Click the checkmark next to the correct answer(s).
- Set a time limit for each question (from 5 seconds to 5 minutes).
- Click “Save.”
- Save the Set: Once you’ve added all your questions, click “Save Set” in the top-right corner. Your set is now ready to be hosted.
How to Host a Blooket Game
With your question set chosen, it’s time for the main event: hosting the game.
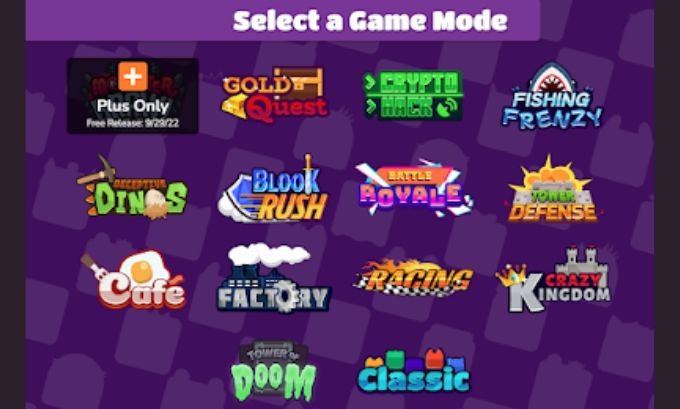
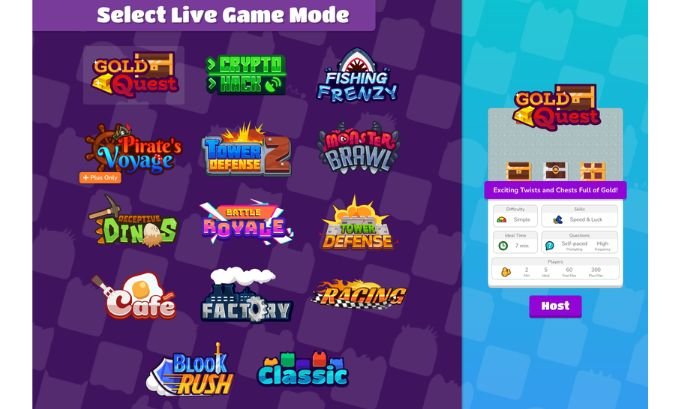
Step 1: Select a Game Mode
After clicking “Host” on a question set, you’ll be presented with a variety of game modes. Each mode has a different objective and play style. Some popular options include:
- Gold Quest: A fast-paced game where students answer questions to open treasure chests, steal gold from others, and accumulate wealth. Great for high-energy fun.
- Tower Defense: A strategic game where students answer questions to earn resources and build towers to defend against waves of enemies.
- Factory: A simulation game where students unlock and upgrade “Blooks” (characters) to produce the most money.
- Racing: Students answer questions correctly to advance their Blook in a race against classmates.
Click “Host” on your preferred game mode.
Step 2: Configure Game Settings
Next, you’ll see a “Host Game” screen with several settings. Here, you can customize the game’s duration and other rules.
- Host With…: Choose whether to set a time limit or a goal (e.g., first to collect 100 gold).
- Allow Late Joining: It’s a good practice to keep this enabled so students who get disconnected can rejoin.
- Use Random Names: This feature assigns fun, random nicknames to students, which can be useful for privacy and preventing silly usernames.
Once you’ve configured the settings, click “Host Now.”
Step 3: Launch the Game and Invite Students
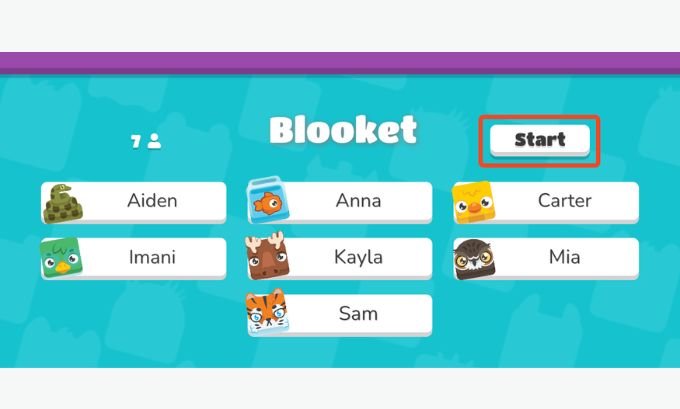
The game lobby will now appear on your screen. This screen displays the essential information students need to join.
- Share the Game ID: A unique 7-digit Game ID will be prominently displayed. Instruct your students to go to blooket.com/play and enter this code.
- Display the QR Code: Alternatively, you can project the QR code on your screen, and students with mobile devices can scan it to join instantly.
- Wait for Players: As students join, their nicknames will appear in the lobby. You can see the player count and kick any player if needed by clicking on their name.
- Start the Game: Once all your students are in the lobby, click the “Start” button to begin the game.
During the game, your host screen will display a leaderboard or an overview of the game’s progress. You can project this for the class to see, which often adds to the excitement.
Managing the Game as a Host
As the host, you have control over the game. You can:
- Mute Music: Turn off the background music if it becomes too distracting.
- End the Game Early: If you need to wrap up, you can end the game at any time.
- View the Report: After the game concludes, Blooket provides a detailed report. This report shows each student’s accuracy, a question-by-question breakdown, and overall class performance. It’s an excellent tool for formative assessment, helping you identify topics that may need further review.
Making Your Blooket Experience a Success
Hosting a Blooket game is more than just a technical process; it’s about creating an engaging learning experience. Here are a few final tips:
- Explain the Rules: Before starting, briefly explain the objective of the chosen game mode, as some can be complex.
- Mix Up the Modes: Keep things interesting by using different game modes for your review sessions.
- Use It for Review, Not New Content: Blooket is most effective for reinforcing concepts students have already learned. The fast-paced nature isn’t ideal for introducing brand-new material.
- Celebrate the Winners: Acknowledge the top performers, but also praise the entire class for their effort and participation.
By following this guide, you’re now equipped to host your own Blooket games and bring a new level of excitement to your classroom.
Want to upgrade your classroom tools and teaching resources? Explore Tokyo Mart’s curated collection of smart gadgets and tech-friendly supplies for modern educators.